JT Assistant Sources
JT Assistant is published under a double license: GPL v2 and a Commercial license for those looking to incorporate this software into their own business.
3rd-party products can be downloaded.
Requirements
The following 3-rd party products and tools are mandatory for building of OPEN CASCADE JT Assistant:
- CMake version 2.8.10 or later;
- Open Cascade Technology version 6.8.0 or later;
- Intel® Threading Building Blocks version 4.3 or later;
- zlib version 1.2.8;
- Qt version 5.2.1 or later (in fact, only QtBase module is necessary);
- C++ compiler:
- for Windows: Visual Studio 2010 or Visual Studio 2010 Express SP1 or later;
- for Linux: gcc 4.4.1 or later.
Building mandatory 3-rd party products
The building of mandatory 3-rd party products, Open Cascade Technology and zlib, is necessary to build OPEN CASCADE JT Assistant. It is supposed that the target platform is Windows 32 bit with Visual Studio 2010 used as IDE.
If you have all prerequisites installed, pass to “Building OPEN CASCADE JT Assistant” section.
The building procedures for TBB and Qt are time consuming, therefore we do not provide their description. Please visit TBB and Qt project official sites for detailed information.
Open Cascade Technology
The building of OCCT base modules forms the background for OPEN CASCADE JT supporting tools. Note that the building of JT Assistant requires the compilation of only two toolkits - TKernel and TKMath.
If you use the current development version of OCCT (available via Git, please visit Open CASCADE Technology collaborative development portal for the details) you do not need any 3-rd party products, so you can switch them off in OCCT CMake. However, if you use an earlier version you have to use TBB, TckTk and FreeType.
If you prefer to use a stable version of OCCT instead of a development one, please, get it.
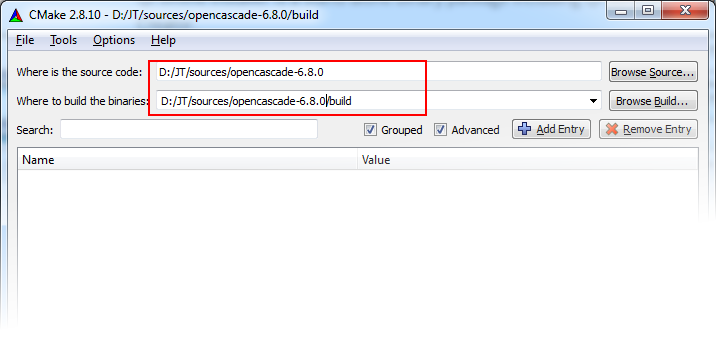
It is supposed that you have already downloaded OCCT sources either from JT Assistant page or from the official site. Run CMake, specify source and build directories to configure OCCT and click “Configure”.
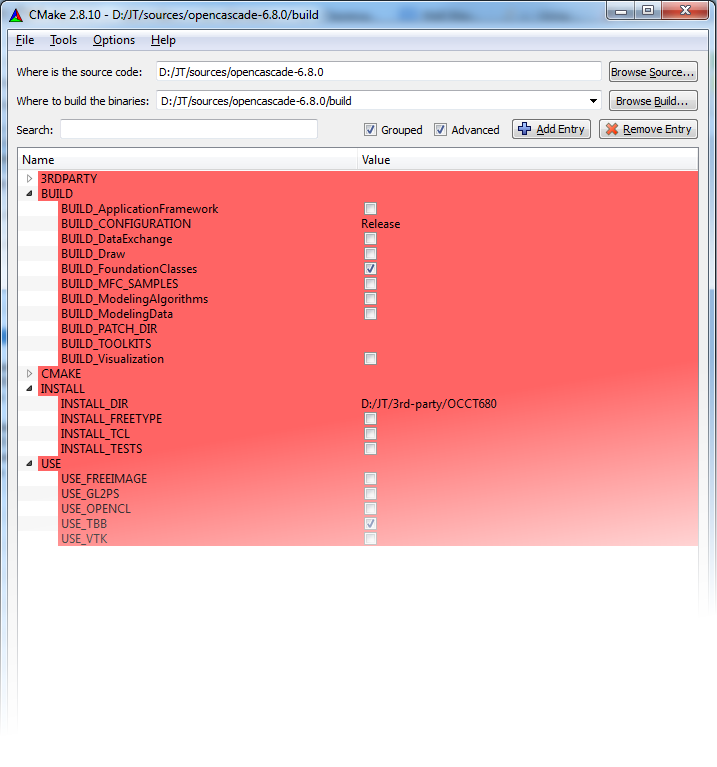
To build TKernel and TKMath toolkits required by JT Assistant you have to uncheck all modules with BUILD_ prefix except for Foundation Classes. INSTALL_DIR should also be specified and point at the installation directory.
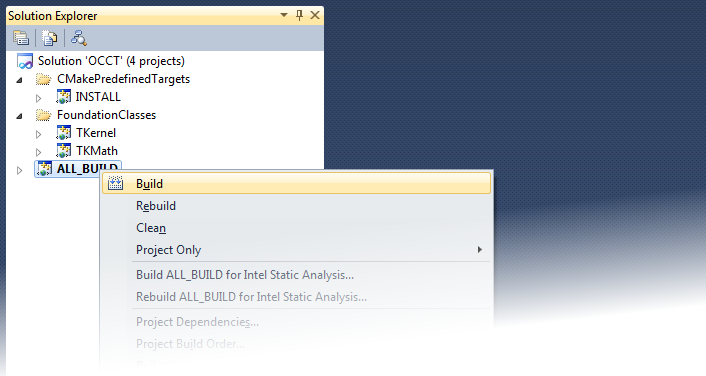
Click “Generate” button to create project files in the build directory. After that, you should run your IDE, open the generated OCCT.sln from the build directory and perform usual actions to build and install OCCT libraries.
zlib
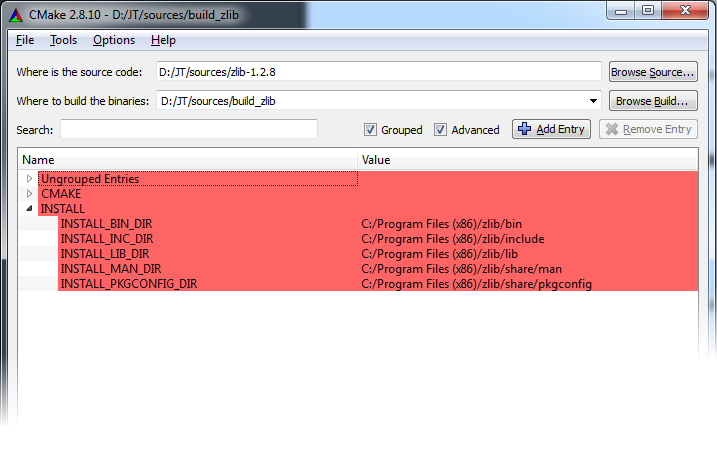
Zlib can be built using CMake. During the configuration, define the destination directory in variables with prefix INSTALL_ or leave it initialized by default. When the configuration is finished and the projects are generated, build and install it as described above.
Building OPEN CASCADE JT Assistant
OPEN CASCADE JT Assistant can be built from sourсes with CMake build system, which is the standard platform-independent way to build the product.
The building process is described for for release mode and the target platform is Windows 32 bit with Visual Studio 2010 used as IDE. It is supposed that all necessary 3-rd party products have been built or installed on the target computer.
Getting the sources
You can get JT Assistant sources by downloading the source package from the official web-page or by cloning the corresponding Git repository:
git clone ssh://gitolite@git.dev.opencascade.org/jt jt
As a result, you obtain the following structure in your filesystem:
./jt/CMake
/JTAssistant
/TKJT
/…
Configuring
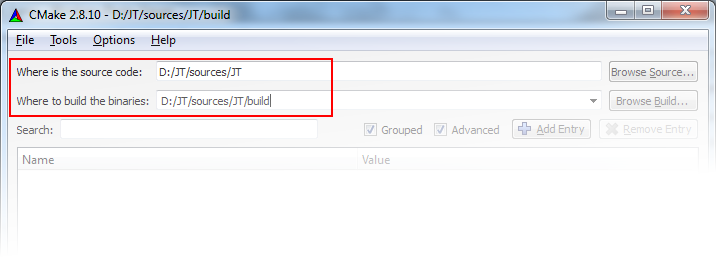
To generate project files for the target IDE you should run CMake GUI utility. It is preferable to use different directories for various build configurations and to avoid using the source directory as a build one. First, you should specify the path in your filesystem, where JT Assistant sources are located, and a working directory used for building.
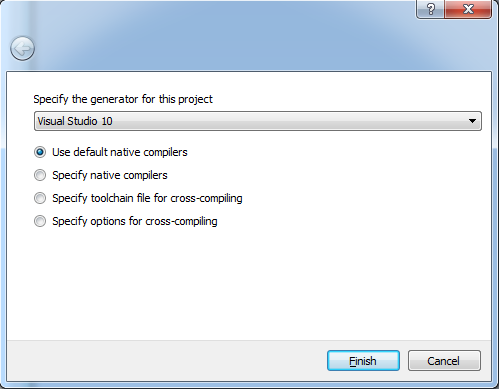
After that, “Configure” button should be pressed to start the manual configuration process, which starts from specifying a project generator. In our case it is Visual Studio 10.
Once the “Finish” button is pressed, CMake outputs the list of environment variables to be properly initialized for successful compilation. These variables define the paths to 3-rd party products and the content of resulting build.
The following table gives the full list of environment variables used at the configuration stage:
| Variable | Type | Purpose |
|---|---|---|
| BUILD_PROJECT | String | Enumerates the projects to be configured. Two options are possible: “JT Assistant” or “TKJT”. If TKJT option is chosen, only the project for OPEN CASCADE JT supporting tools will be configured. Otherwise, the project for OPEN CASCADE JT Assistant will be generated. “JT Assistant” is chosen by default. |
| BUILD_TKJT | Boolean flag | Indicates if TKJT module should be built together with JT Assistant or not. If not, the user should specify he path to TKJT. |
| TKJT_ROOT_DIR | Path | Path to TKJT binaries; available only if BUILD_TKJT is unset |
| EIGEN_ROOT_DIR | Path | Path to Eigen library. By default Eigen is included into JT Assistant sources; hence this variable is already initialized. |
| OCCT_ROOT_DIR | Path | Path to Open Cascade Technology binaries |
| QT_ROOT_DIR | Path | Path to Qt root directory (for example, if you have installed Qt using installation procedure from the official site, path should be like <QT_install_dir>\5.4\msvc2010_opengl); |
| TBB_ROOT_DIR | Path | Path to TBB root directory |
| ZLIB_ROOT_DIR | Path | Path to zlib root directory |
| OCCT_* | Path | Paths to OCCT binaries |
| QT_* | Path | Paths to Qt binaries |
| TBB_* | Path | Paths to TBB binaries |
| ZLIB_* | Path | Paths to zlib binaries |
| OPENGL_* | Path | Paths to OpenGL binaries |
Note: Please, never use back slashes ("\") in CMake options defining paths. Only the forward slashes ("/") are acceptable.
The variables listed at the end of the table defining paths to 3-rd party binaries will be set automatically when the paths to their root directories are properly initialized.
The installation directory is the only mandatory option to be specified. This option stores a path, where JT Assistant will be deployed after building. For that, you should initialize CMAKE_INSTALL_PREFIX variable (by default it points at C:/Program Files/JT on Windows).
If all options have been defined consistently, pressing “Configure” button will create CMake configuration files in the target build directory.
Building
Once the configuration process is done, "Generate" button can be used to prepare project files for the target IDE. In our example the Visual Studio solution will be automatically created.
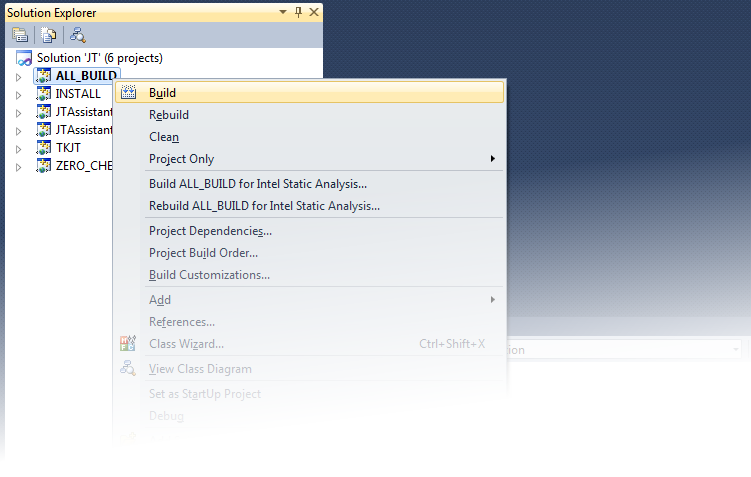
After that, you should run your IDE, open the generated JT.sln from the build directory and perform the usual actions to build JT Assistant.
Installation
The installation is a process of extracting redistributable resources (binaries, include files, etc.) from the working build directory into a target place. The target directory will be free of project files, intermediate object files and any other information related to the build routines. To perform the installation, you are supposed to build the dedicated INSTALL project, which copies all necessary resources to the destination directory (which you have pre-configured with CMAKE_INSTALL_PREFIX CMake variable).

